Learn Grow Share

Category: Uncategorized

Growing Spinach Using the Kratky Method

Growing Spinach Using the Kratky Method
Introduction

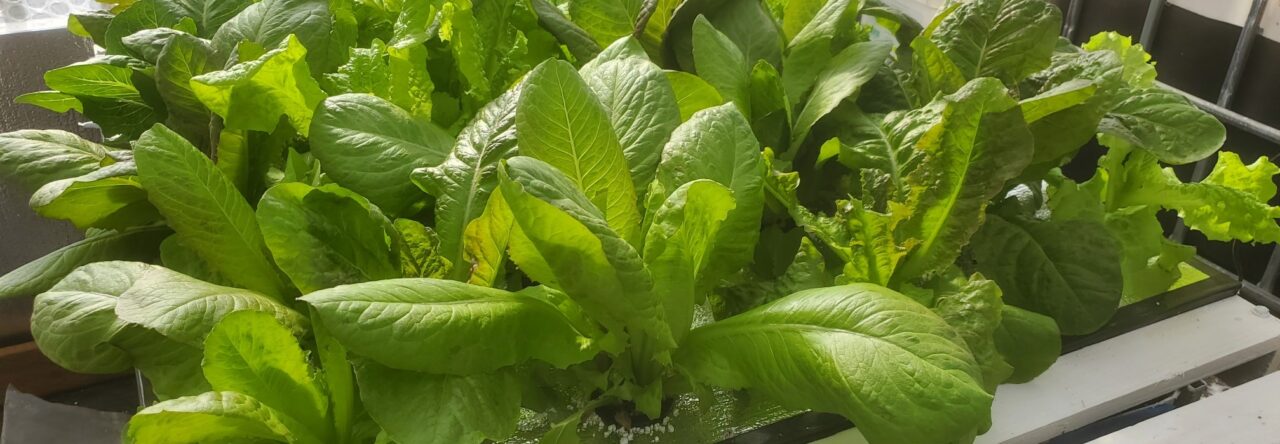
Spinach is a highly nutritious green leafy vegetable that is packed with vitamins, minerals, and antioxidants. It is a popular vegetable to grow in home gardens because it is easy to grow and can be grown in a variety of growing conditions. The Kratky method is a simple hydroponic growing method that is ideal for growing spinach indoors or outdoors, especially for those who do not have access to an electric power source or do not want to invest in expensive hydroponic equipment.

This page will provide step by step guidance on how to grow spinach using the Kratky method, which involves growing spinach without soil, using only water and nutrients.

Materials Needed

Spinach seeds
Net pots or containers with drainage holes
Hydroponic nutrients
Water
pH test kit
Clean, sharp scissors
Grow lights (if growing indoors)

Steps in Growing Spinach Using the Kratky Method

Fill the container with nutrient solution up to the bottom of the net pot.
Test the pH of the water and adjust it to 5.5 to 6.5, which is the ideal range for spinach growth.
Put the net pot or container with drainage holes on the container
Plant the spinach seeds in the net pot or container. Cover the seeds with a thin layer of the growing media
Place the container in sun or a well-lit area or under grow lights for approximately 10 hours per day.
Monitor the pH and nutrient levels of the water and adjust as necessary.
Harvest the spinach once the leaves have reached the desired size. Use clean, sharp scissors to cut the leaves off just above the base of the plant.

Tips for Successful Spinach Growth

Choose a variety of spinach that is suitable for hydroponic growth, such as the Bloomsdale Long Standing or Tyee spinach.
Make sure the container is blacked out to sunlight to prevent the buildup of algae and bacteria.
Keep the pH level within the specified range to ensure optimal nutrient uptake by the plant.
Harvest the spinach leaves regularly to encourage new growth.

Conclusion

Growing spinach using the Kratky method is an easy and inexpensive way to grow spinach without soil. This method is suitable for those who have limited access to electricity or do not want to invest in expensive hydroponic equipment. By following the steps outlined in this page and using the tips provided, you can grow fresh, nutritious spinach at home, all year round.

Our New Seeding Trays Arrived

1020 seeding trays 6 cell tray inserts and humidity domes
Our new 1020 seeding trays, inserts and humidity domes are here!

When we first started doing our own seed starting, like everyone, we went and bought the Jiffy seed starter trays and pots. They were inexpensive and did the trick, or so we thought. The next year when we pulled them out to reuse they were in pretty poor shape. The linings of the plastic seed cells is so thin that most had cracked at best were pretty scrunched up. Well no worries, we’ll use them and get a few more, their cheap right? That process repeated over the next few years and our collection of cheap barely reusable Jiffy trays grew. Some from the original purchase were no longer usable. Not only had the cell walls split, but the trays cracked and would not hold water or support the cells. Also the lids cracked and got weak and barely functioned.

Jiffy seed tray
Common Jiffy Seed Starting Kit

Heading into our forth year of seed starting, I started really investigating options for sturdy reusable seed trays. I learned a lot including that they were called a 1020 tray. That got me on the right track. I then found trays labeled as heavy duty, extra heavy duty and mega heavy duty! I also found the 6 cell tray inserts that are made of the same material. They make heavy duty clear lids too! Some lids have tall domes with humidity vents.

Last year I did the math on what I’ve used in the past and what I was looking at buying in the future. The Jiffy trays and lids run between $8 to $13 a piece depending on where you buy the trays. Lets just say $9. I’ve probably bought 10 in the last 5 years and at this point they are all pretty much useless. I’d need to buy 10 more since my garden has expanded. And in a few years I’d need 10 more, and so on just to have 10 on hand for use. In this real example I’d be looking at spending $300 and would have been dealing with junk year after year and ended up with nothing in the end.

I opted to buy the best 1020 trays, cell inserts and lids I could reasonably find that if taken care of would last for years and years if not for the duration of my gardening life. I probably spent $35 – $50 on 10 heavy duty trays. Then I spend another $35 to $50 on the 120 6 cell tray inserts needed to fill 10 trays. Finally I bought the 10 clear lids which are also heavy duty to cover the 1020 seed trays. I think in total, with free shipping I was out under $200. What I got in return was 10 trays, cells and lids that would last and last and provide year after year of beautiful seedlings for our garden. I think this lesson I learned transcends into every aspect of life and gardening. There is nothing cheap about buying cheap! Spend your money wisely and buy the best quality you can afford. You’ll save a lot more in the long run!

I’m going to follow this article up with a video and write up comparing the types of 1020 seeding trays available and what my experience and opinion is on them! Stay Tuned!!

High dome 1020 lids with humidity vents
High dome 1020 lids with humidity vents!

My Day in the Greenhouse

I use this blog as way to keep track of times and events for reference later in the year and years to come. This Sunday afternoon was spent cleaning out the remaining unused seeding trays, making fresh seeding soil mix and seeding up 8 more trays. I have found that making your own seeding soil is not only easy but a fraction of the cost of bagged seed starting mix. There are lots of great DIY seeding mix recipes but I have found that a 3:1 or 2:1 mix of Peat Moss / Perlite does well keeping the soil moist but also keeping it draining well. I mix it with water and let it soak. The right mixture is when it clumps nicely when you ball it up in your hand but it is not drenched.

DIY seeding Soil
Making our own seeding soil

First up was our favorite heirloom tomatoes!

  • San Marzano
    • San Marzano tomatoes are a type of Italian plum tomato known for their sweet and slightly tangy flavor, meaty texture, and low acidity. They are prized by chefs and are commonly used in Italian cuisine, especially in tomato sauces for pasta dishes. San Marzano tomatoes are long and cylindrical with a slightly pointed end and a bright red color. They are considered to be sweeter and less acidic than other varieties of plum tomatoes, and are grown in the volcanic soil near Mount Vesuvius in Italy. These make up half of the tomatoes we grow. Perfect for sauce and sun dried tomatoes!
  • Mariglobe
    • Mariglobe tomatoes are a variety of tomato known for their juicy, sweet flavor and high sugar content. They are medium to large in size, round, and have a bright red color. They are often used for slicing and eating fresh, as well as in salads and sandwiches. Mariglobe tomatoes are known for their high yield and are often grown commercially due to their ability to withstand shipping and handling. They are also popular among home gardeners due to their relatively low maintenance and resistance to common tomato plant diseases. Mariglobe tomatoes are prized for their sweet, juicy flavor and versatility in cooking and are a popular choice for many gardeners and chefs.
  • Bonnie Best
    • Bonnie Best tomatoes are a variety of tomato known for their high yields and delicious flavor. They are medium to large in size, round, and have a bright red color. They are popular among home gardeners for their easy-to-grow nature and resistance to common tomato plant diseases. Bonnie Best tomatoes are often used for slicing and eating fresh, as well as in salads and sandwiches. They are known for their sweet, juicy flavor and are a popular choice for those looking for a tasty tomato variety to grow in their home garden. Additionally, Bonnie Best tomatoes are highly productive and provide a steady supply of tomatoes throughout the growing season.
  • Sweety
    • Sweety cherry tomatoes are a variety of cherry tomato known for their sweet, juicy flavor and bright yellow color. They are small in size, typically around 1 inch in diameter, and have a round shape. They are often used for snacking, in salads, and as a garnish due to their sweet taste and bright color. Sweety cherry tomatoes are popular among home gardeners and are easy to grow, producing large yields and maturing early in the season. They are also a good source of vitamins and antioxidants, making them a healthy addition to any diet. Sweety cherry tomatoes are prized for their sweet flavor, attractive color, and ease of growth, making them a popular choice for both home gardeners and commercial farmers.
  • Delicious
    • These guys are monsters! Have had them well over 1lb! Delicious tomatoes are a variety of tomato known for their large size and sweet, juicy flavor. They are round in shape and have a bright red color, often weighing up to a pound or more. They are often used for slicing and eating fresh, as well as in salads and sandwiches. Delicious tomatoes are popular among home gardeners for their easy-to-grow nature and resistance to common tomato plant diseases. They are also prized by commercial growers for their large size and high yield.

Error thrown

Call to undefined function wp_unique_id_from_values()